Friday 20 December 2019

Heart to heart


I was looking for something different to do with the artist trading hearts from Chocolate Baroque, and this is what I eventually came up with.   I made a hanging using two of the whiteboard hearts
along with a larger mdf heart that was an impulse buy at a local show held together by a folded strip of silver ribbon.

I have to admit to using brusho powders again, which made this quite a quick project to do if you didn't count the drying time....
The colours look rather different in the photograph of the finished hanging to those in the scans of the individual hearts, though the small hearts did end up noticeably bluer.

The larger heart was painted with gesso first and some stencilling with structure paste to give some texture, but the whiteboard ones were used just as they came. They were all sprinkled with a mix of black and grey brusho powders, sprayed with spray starch and covered with crumpled cling film then left to dry.
While they were drying I coloured a couple of sheets of white card similarly, but just using grey  this time.
 The magnolia flowers were stamped using black versafine ink onto the card and clear embossed, then fussy cut out and glued onto the hearts


Wednesday 4 December 2019

butterflies

 I loved the butterfly stamps that were featured on the Chocolate Baroque November tv show -apart from anything else, it was an excuse to get the brusho powders out! I created two sheets of fairly random colours using the brusho, abnd then stamped the butterflies several times when dry using black versafine ink. I fussy cut the betterlooking butterflies out, and used them to add to the stamped images..
Backgrounds were a mixture of sponged colour and inks sprayed with water and picked up from a mat. I used distress oxide inks in squeezed lemonade and hickory smoke, ading stmaped butterflies in smoke between the sponged and mopped layers for the first card.


The second card background was stamped with sentiments from the harmony tree and rememberance tree stamps in smoke ink and the splodges from the butterfly set before sponging with the smoke and lemonade inks.


The show also featured some initial stamps, rather different from previous designs, which were fun to work with.
I went for simple this time, with a very light brusho background for the first card after the image was stamped and embossed.


The trees were coloured with brusho powder, and I used the word definition stamp to create the background


Sunday 24 November 2019

ephemera

Today i am sharing some photos of the journal i made for the Chocolate Barqoue October tv shows.

I don't know about you, but I find that if I try to plan a project out in detail, it always goes wrong - happened again with this journal! It's much safer to just play, get messy and inky and then see what i have got.


I used a Sizzix journal die, and had plans to create a mixed media holiday souvenir journal using all the stamps in the ephemera sets and some older seaside related sets.


The cover went ok, using kraft card as the base with lots of gesso and paint splodged on. and the beach huts stamped in the centre, with the journey word. I also used a mini photo from Crafty Individuals
 I ended up salvaging the better of the inner pages to create a slim journal - this one had another  CI image, the beach huts again, ammonite stamp , sea shells and the travel ticket.
I also used the chess stamps, the fountain scenelighthouse and flower stamps to create the other pages.
 I did have fun - sort of - and next time I won't bother planning it out!


 I also reused an empty coffee can, covering it with kraft card and stamping images using brown ink, adding colour with pencils.


Saturday 9 November 2019

lemon and grey flowers

 A very miserable day here today - wet ,grey and definitely not warm - so I decided to show you the cards I made using the flower stamps from last month's shows by Chocolate Baroque to brighten things up a little.


All three cards have a similar background, using hickory smoke and squeezed lemonade distress oxide inks sponged onto white card after masking the stamped and clear embossed flower image .
The first card uses the floral grunge stamp, simply coloured with watercolour pencils, trimmed down to fit a 5"x7" card black with a black mat.


same stamp for the second version, with rather more grey in the background this time and watercolour pencils again, but with stronger colours


The final card with the movie strip collage stamp was coloured with brusho powders. The orange brusho was sprinkled over the flower image and activated using a damp paintbrush - you get all the random variety of colour this way, but in a more controlled fashion

Sunday 27 October 2019

artist trading hearts

 Lesley Wharton has created artist trading hearts for Chocolate Baroque, just that little bit different from the trading coins, and much easier to work on as they are larger.
I enjoyed playing with these, especially as I had just discovered the trading coins....
I stamped the geometric trading heart onto white card and cut it out after colouring with watercolours and adding the words stamped onto a scrap of brushoed card.
The other two I used the plain heart from artist trading heart stamped onto some leftover marbled card, created using the shaving foam technique.  The magnolia was stamped directly onto the heart and coloured with pencils.
The butterfly stamped directly ontot he third shape and coloured with watercolour paints.

The small canvas board was an experiment that didn't quite work. I sprayed the board with some very elderly glimmermist sprays in greens and silvers, then spread texture paste diagonally across it. I stamped into the wet paste using the filigree heart stamps but got a very blurred result. Once dry, i resprayed the whole board and sprinkled some copper embossing powder into the wet inks. White words are from a stencil, the geometric heart was stamped onto a spare piece of card cololured with brusho using versafine and clear embossed. Words and the arrow wer stmped onto tissue paper, torn out and added using modpodge


Thursday 17 October 2019

Tomte wreath

It's been months  since I made anything for Crafty Hazelnut's Christmas challenge, but I couldn't resist this one, when I saw the challenge #459 had a stocking as an added ingredient - plus the fact that I really need to make a start on my Christmas cards!
Both sets of stamps used are from Chocolate Baroque - the mistletoe foliage is from the Christmas Garden, and the lovely gnomes and words from a Tomte Christmas.
The wreath is really easy to create if you have a stamping platform, or you can use a circle diecut to stamp round.

Thursday 10 October 2019

magnolias

  The stamps for the Chocolate Baroque September TV shows were all lovely, but I am sharing my absolute favourite today , the magnolia from the the happy flowers day sheet. It is a large image, just perfect for colouring, and suitable for so many occasions - I never got round to making the sympathy card version.
Both of these card are 8" square, so that gives you some idea of the size of the stamp. very similar technique for both. The first version began with white card, spomged with distress oxide inks, mostly using antique linen and wild honey, with a heart shape masked off (I used the heart stamp to create the mask) after stamping the heart from geometric trading hearts. I randomly stamped the same heart stamp in the background using it hand held. The m  agnolia was stamped in versamark and white embossed before colouring with koh-i-nor watercolours. The sentimnent and butterfly were stamped with black versafine

The second card has a base of kraft card, stamped with various small wordstamps from the sets in the show, using vintage photo distress oxide ink, which was also sponged round the edges.
Magnolia again white embossed and watercoloured - the colours were those in the first card, but the darker base really makes them pop. The sentiment was also white embossed.

Monday 7 October 2019

ragged dragon butterfly

 I'd had this stamp from Artisan Design for a while before I got a chance to play with it.  Whilst my favourite brusho was drying, I thought why not try it on a candle ....as i was just back from a WI craft day where I was demonstrating how to decorate candles,  while all the gear was out I would see if it would work .... as luck would have it, I had a candle just the right size!
Stamped onto white tissue with black versafine ink, and coloured with promarkers on the reverse. A bit fiddly tearing it out, but it did work!
When the brusho was dry, I decided I didn't like the version in red - looked too muddy on the butterfly - and the blue butterfly  didn't stand out enough from the background. Fussy cut the blue butterfly out, decided I quite liked it on the red background, so added the sentiment and edged it with black  marker pen, mounted onto a 6" square white card.

I am adding this to the following challenges
addicted to stamps -for a lady/girl
corrosive challenges - anything goes
we love 2 create - anything goes mixed media
colour crazy challenge - anything goes

Monday 16 September 2019

eastern dream

 To me, this turret house stamp from Chocolate Baroque looked very Russian, so that is the effect i tried to get.
I stamped onto black card using versamark, heat and stick powder and gilding flakes, trimmed it down and mouinted straight onto a 7x7 white card blank with the sentiment stamped in black

 This one I coloured directly onto the stamp using distress pens, and stamped onto damp card. The colours spread to give a blurry image that was a bit too dreamy, so once it was dry I overstamped with black versafine -  as i used a stmping platform, there was no problem matching the images.
Sorry for the poor scan, this one was a DL size card.  Coloured again with the pens, and I just huffed onto the stamp to wake up the inks. It was a faint image, so I reinked the stamp again and stamped a second time to get a more definite image.


Wednesday 4 September 2019

poppy cottage

 Three cards using the lovely Poppy Cottage stamp from Chocolate Baroque  - sadly a limited edition stamp from a Kim Moody drawing of Judith's lovely home, but still available at the moment......
You know I had to use brusho powders at least once, so that is the first one to show, get it out of the way! Simply stamped with black versafine , clear embossed and sprinkled lightly with brusho over the roof and walls then spritzed generously with water. Stamped the sentiment in black then trimmed down to a square. Letters were then die cut from the image - I have a magnetic platform for my big shot, which helps keep the letters in place. A piece of red card was added behind the image, which was then matted onto a light brown card  and then onto a white base card blank. The cut out letters were then mounted slightly offset
                                                                                  using foam pads


Version two I coloured the stamp with  distress markers, spritzed lightly with water and stamped onto white card.It was a rather vague result, so I inked up the stamp with black versafine and stamped again once everything was dry - I use a stamping platform, so no problem matching the image up.
The third version also used the distress pens to colour the image - this time i just huffed onto the stamp to wake up the inks. I used a stamp from the butterfly  poppy plate to create the background, inking with markers again and just stamping part of the stamp


Monday 2 September 2019

crafty weekend

Sometimes everything comes at once - after a few days playing with new stanps from Chocolate Baroque (look on Hochanda tomorrow at 10am and 2 pm to find out what they were!) there was a workshop with Janet Pring on saturday and our regular craft club on Sunday....
we used stamps by All&Create  on Saturday and got nicely inky and painty.
 I loved the poppy stamp we used in the morning, but not so much the afternon sets - have to admit I didn't like the matching dies, the white edges really annoy me, so fussy cutting it was.....

Whinge over, parade of poppies - first two have similar distress oxide backgrounds overstamped in the same colours with the smaller smaps from the set. The first one I used antique linen  and frayed burlap , the second peeled paint and twisted citron. The poppies were painted using koh-i-nor watercolours.


 this is almost what Janet hoped we would do, a gelli plate background with some overstamping - well, very little overstamping and I left out the stencilling and the decoupaged poppies........just a more minimalist version!

I borrowed a different set of stamps that we had used the previous workshop and used the flower head to create a background, stamping it in several colours of distress oxides and swiping a baby wipe over to mix everything up into a blurry background.

Both sets were designed by  Tracey Evans, sorry can't remember what they are called though

 Afternoon we used the gelli plates again, with stencils for texture and the new animal sets of stamps and matching dies. Went mad and used the unicorn band set, which i definitely regretted by the time I had cut them out!
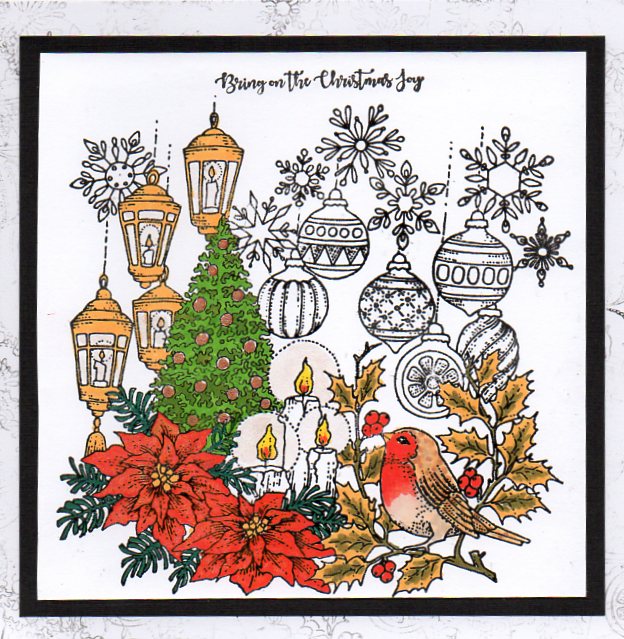
 Sunday was craft club and Hobby Art stamps brought by Moira - these were new stamps, with a lovely main image that was just right for quick Christmas cards.......and I just could not get mine to stamp out properly. So went off-piste (as Janet says) and just used it in my hand to create a background. I stamped the single pine cone in grey in the centre 4 times - which of course stamped beautifully - and again onto spare card.
I coloured with koh-i-nor watercolours and decoupaged the pine cones.


I then  just played with the pine cone, and tried it out as a wreath, the first one is using a 6.5" square piece of card and the second a 5.5" square of card -  they just need sentiments now.


Tuesday 20 August 2019

robin

 There has to be a robin for Christmas, and this little chap is on the Christmas circles stamp set from Chocolate Baroque..
I stamped him onto white card using black versafine and clear embossing powder, and then added the brusho powders in lemon and green, trying to keep the background behind the stamp light. Did end up with a steak of green where I didn't really want it, but that is part of the fun with brushos, you never know what you are going to get!
Coloured everything with pencils, ordinary ones this time that I had forgotten I had - probably because I wasn't too happy with the quality after the initial set (hasten to add they did not come from Chocolate Baroque, and they weren't cheapo ones). I used the holly leaves part of the stamp to stamp the random background onto the base card bewfore adding black and gold mats to the robin.
My second version used a scrap of previously coloured card which was much darker in tone. Again stamped in black and clear embossed and coloured with the pencils and a blender pen. Cut out using a fancy die and mounted straight onto a white base card. sentiment is from the same set.

Monday 5 August 2019

Christmas garden


 It didn't feel a bit like Christmas making these in blazing sunshine...but this BIG stamp from Chocolate Baroque made it so easy!
I did three versions in the end, it was so easy to keep playing.
First one was simply stamped in black versafine ink and clear embossed. I coloured the robin, lanterns, tree and poinsettias using koh-i-noor watercolour paints. The sentiment from Christmas circles was stamped at the top before addin a mat of black card. The white base card was randomly stamped in grey ink using the baubles bit  and holding the stamp in my hand.


As a brusho addict, i just had to try with brushos and this was the result. Background was a mix of yellow and turquoise powders well spritzed with water. Once it was dry, the image stamped in black versafine and clear embossed. I used bleach and a paintbrush to lighten the lanterns, candles stars and baubles. The robin, holly, poisettias and the candles were painted with watercolours again - the background was fairly light behind the poinsettias and the robin, and the watercolours easily covered it up. The card was edged with black marker pen, and added to narrow gold and black mats before adding to a white base card.
 This one was simply stamped on black card with versamark and embossed in white before painting the candles and poisettias with watercolour paints. Gold and red mats before adding to a white base card.


Number four took  a lot longer, but most of that involved fussy cutting the poinsettias out.
I used the small mistletoe sprig and used my stamping platform to create a wreath, stamping in two different green inks. The poinsettias were stamped in black versafine onto white card and clear embossed before colouring with marker pens - I think I stamped them six times altogether, but it could have been more. The sentiment comes from the Christmas circles set

a little bit different, and while there are probably not too many people with Christmas birthdays, they do deserve a birthday card!


Sunday 28 July 2019

spring into summer....

Hobby Art workshop with Moira Walters and the usual crowd of suspects at Costessey yesterday - we sweltered despite the air conditioning, but all survived , and at some point we all actually produced something resembling a sample !!

Spring card first , using the wren stamps. The trio of birds was stamped in grey, the stump and large bird in black versafine, with the bird stamped again onto spare card. Coloured with koh-i-noor watercolours, and the spare bird coloured and cut out, then glued over the original stamping - saves cutting out the fiddly feathers.....
background pattern by stamping the leaves from the set in various greens then sponging over with the lightest green

 Front of the 8"x8" card was cut in half to stamp onto, and I left the back half intact to add the kids and a greeting. Fence and stone stamped in grey, goat in black, once onto spare card and once onto card base. Watercolours again, and the goat stuck over the stmaped one again.


I used a circle mask and brushed blue distress ink lightly across to create the sea and sky. The houses and sea wall were stamped onto spare card, coloured ,cut out and glued in place  after stamping the yacht.  The yacht was stamped onto spare card and colopured in, then the hull and sails cut out and glued into place.  seagulls in the sky to finish.
I used the card circle I was meant to use for the first card to make another card, stamping the houses in grey ink onto the circle and brushing some watercolour roughly around to create the sky and sea. Seagull in black, and the wall and yacht stamped onto spare card in black and coloured with watercolours . The background uses the small stamps stamped in distress oxides and sponged round the edges, circvle edged by running over a versafine ink pad.

Thursday 18 July 2019

rose candle set

 For my second post for Chocolate Baroque
this  month i am back to playing with another favourite, a decorated candle.

I used the small rose from the rose set  - you don't necessarily have to use the larger images to create an impressive effect.....

I stamped the rose three times onto white tissue paper and coloured on the reverse with marker pens. Paint with a wet paint brush round the edges of the design and tear out carefully.  Lay the images one at a time onto the candle, wrap a sheet of copy paper firmly round to hold in place and heat with a heat gun on a low setting to set the image into the candle (I use a very old hairdryer type gun that has a fairly low setting anyway). Repeat placing the other images equally around the candle - the eagle eyed will have spotted that I reversed one image, purely accidental as I dropped it and didn't notice the mistake until too late!

The box was made using an envelope board, with the rose stamped onto the sides before assembling it, and again onto matching card to make a closure using velcro dots.

I added a set of notelet cards using 4" square card blanks using a yellow mat to pick up the cololur of the rose. The back flap of the envelope was also stmaped with the same image, using second generation stamping for a fainter image.