Showing posts with label alcohol inks. Show all posts

Monday, 21 July 2014

Diva Red cards

 These are the cards I did yesterday with Moira and Janet at Gissing - far too hot to do anything but craft in a very leisurely way!
The first card was Moira's, inspired by Laura Williams (am sure Moira will correct me if I got the surname wrong) which has an acetate overlay - on mine it is far flatter than the original, which is how I managed to scan it.
The base card is 8" square, and the main panel is 7". The Sheena flower stamps were stamped with stazon and masked, then the background was done using distress inks on a mat, sprayed with water and mopped up - I used old paper, weathered wood and black soot, bit of an odd combo but I didn't have my box of ink pads with me, and that was what was available, and I really liked the result.

Once it was all dry, we used mildew cleaner (yes, I know, that was what we thought - would have been bleach but Moira had run out of it, and it does work!) to bleach out the flowers from the background. I coloured the leaves in with watercolour pencils after bleaching them.
More flowers were stamped onto the acetate with stazon again, then painted on the reverse with acrylic paints - despite the heat it took a time for the acrylics to dry, so we all ended up finishing off later at home.
The other card was based on one
  Janet
did a while ago using shaving foam  marbled card left over from a Clarity workshop, but we used alcohol inks on some new Chromo(?) card from Clarity, which is very shiny - butterflies are spellbinders dies, not sure about the seed head ones.

Monday, 10 June 2013

doing different

Yesterday was our monthly crafty session at Moira's, and we were all very glad of the heater glowing in the corner as it was a very dull and dank day, though it didn't actually rain.
Moira had found a new to us technique involving alcohol inks and laminating folders  - splashes of inks on the inside of the folder, add gilding flakes, close up and run through the laminator. Stamp a flower stamp with versamark and emboss with black EP on the resulting plastic sheet, flatten quickly with a block, then cut out the flowers and arrange round a diecut stamped sentiment.
Quite simple - until I tried it! Everyone else produced a perfect mixed multicoloured sheet - I got a streaky inky mess..............which looked like a rather lurid underwater scene to my rather desperate eyes. Moira produced a sheet of fish peeloffs,
 and I stuck 2 of the fish onto white card, coloured with promarkers, cut out and glued onto the more underwatery bit of the piece of plastic, along with 3 bits of waterweedy peeloff at the bottom. the fish was coated with dazzling diamonds, which I later regretted, as they took ages to dry........
the card on the right is more what I should have done .
I dug out my inks when I got home - or rather the 4 that I could find - a laminating folder and got going. I added mica powders as well as gilding flakes - it took 3 tries with different laminating sheets to get something approaching a decent result - obviously some makes work better than others, as on 2 of them the inks just slid off the plastic. I used an orphan Chocolate Baroque stamp for the flower, and the EP is a mix of odds and ends of blue and green - sentiment is a Clarity stamp of Moira's. Base card is white pearlescent, mat is vanilla, which doesn't show up too well on the scan, as I had to adjust the colours to get the flowers to look reasonably true.                                                            
 The remaining 2 cards did come out rather more as they should have - apart from me using white EP on grey card rather than black on white card, with the addition of white craft ink on the second card.
Sorry for the squiffy scans, I gave up after I had carefully lined them up with the edge of the scanner 5 times and still got a crooked image............
allium stamp is another Clarity one.
Moira promised to blog her originals soon, so I will be able to see how different my home version turned out.............it's not a technique I will be using a lot, it took ages to clean the rollers of the laminator!

Friday, 29 July 2011

old and new

Another forgotten and recently excavated stamp here in the background - a map stamp from Inkadinkadoo, which was stamped with black memento ink onto white card.The  image was torn out, crumpled up within an inch of being a total wreck, sort of smoothed out and inked with distress inks in old paper, antique linen and tea dye - definitely looked ancient by then! The netting was originally holding lemons, and the bright yellow colour was more or less hidden by using denim alcohol ink, which was rubbed over using the felt pad on the tool - I now also have an interestingly blue smudged background piece of card as well. The new bit is the sail away stamp from Stampin up, just stamped in black onto white card, matted onto a pale blue card. The base cream card was sponged with tea dye ink round the edges
A second card this weekend for Judith's Forgotten Friday!

Thursday, 24 February 2011

use a cd

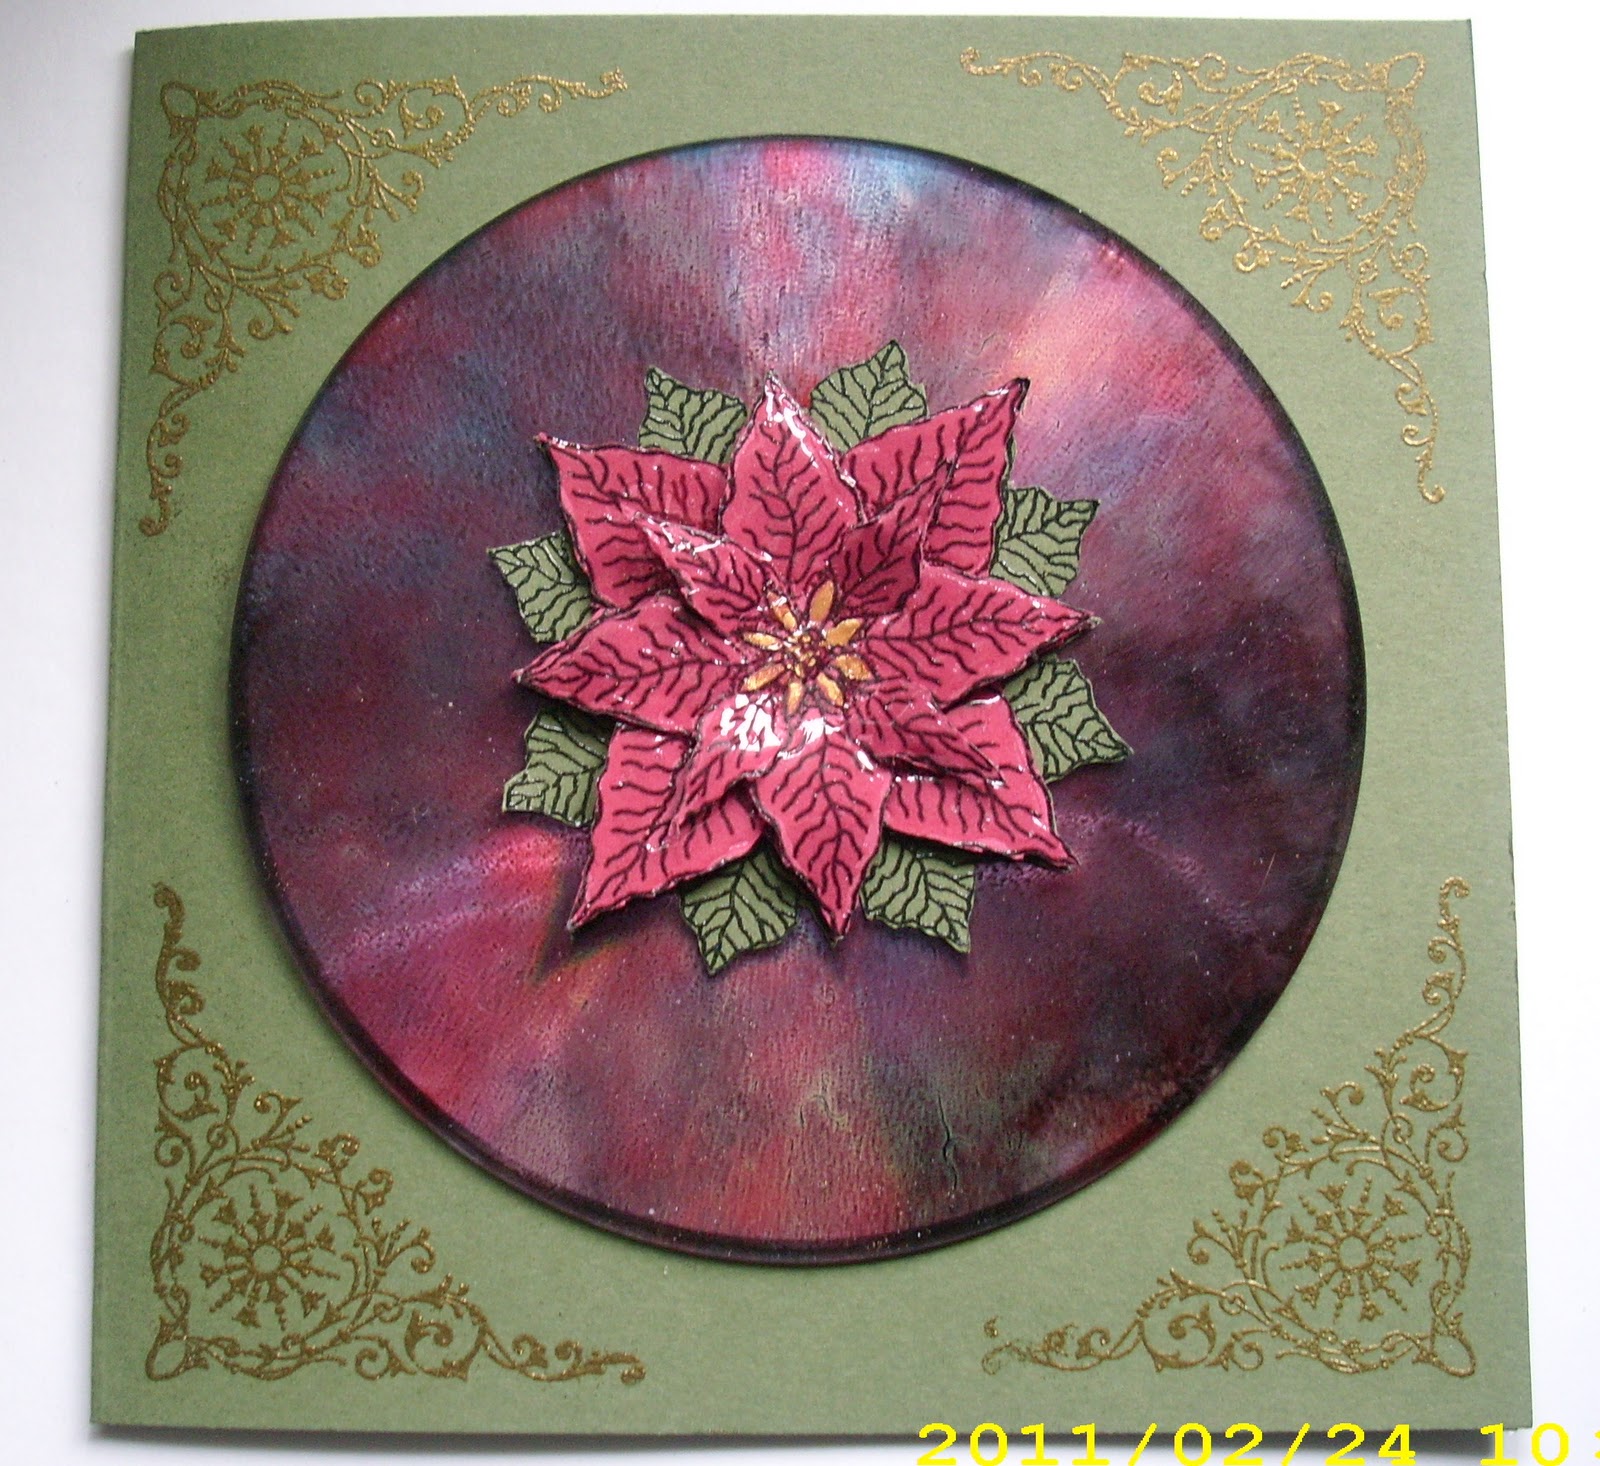
This challenge from Bah Humbug took me back years - I was the sad person who always accepted free cds from internet access reps, so that I could use them on cards ; now they come free with everything and get thrown out, and I had to dig one out of the bin! In those days, I embossed them and then stamped into the hot ep - I still have some of the many colours of ep I used in the drawer.
This cd got coloured with alcohol inks, also dug out of a drawer. the medallion poinsettia stamp also came to light in the search for the inks, so I stamped it several times on green and red card and decoupaged it. The red was coated with a gloss finish after painting some gold in the centre, then stuck on the cd. Corner stamp was by Elusive Images.
The most trouble I had with this was taking the photo - it wouldn't scan well, and the weather has been so dull and grey that it wasn't bright enough to get a decent photo until this morning.