Showing posts with label Diva red. Show all posts

Tuesday, 7 July 2015

Diva Red Saturday


I  had a lovely day crafting on Saturday with Janet and Moira, don't often get to the Saturday workshops, but managed this one at the last minute.
The cards are not in the order we did them, and a couple got finished off at home the next day.
Janet brought some of her collection of Claritystamps and stencils, and the owls were a recent addition. We stamped the owl in place first, then brushed ink through the stencil - Janet had traced round all the letters with a fine line pen, carefully making some lie over/under others, but I thought it looked ok without, so left it as it was.
The owl was stamped onto 3 different coloured papers and paper pieced over the stamped image, and I coloured his beak and legs in with marker pens. The greeting from the word chain series was stamped onto a separate bit of white card, sponged round the edges and fitted under the tail of the owl.
A mat of black card finished it off.
I had originally done two different colourways to see which I liked better, so finished the second one off later. this time I did go round the edges of the letters, rather wobbly effect on some of them!
The owl was coloured with pencils, and I had to cut round his tail to slip the greeting underneath. This time I trimmed the stencil right to the edges, matted onto brown card and onto a smaller plain square card.

 We also used the other stamp in the set - again stamped first, then the background inks brushed through the arch stencil before colouring the owls in with pencils. A double mat, this time orange and brown.


Moira used her favourite Hobby Art stamps, and started with a small card with a fancy fold out insert spotted on facebook.
The insert had to be made first from a square of patterned paper, as the finished size of this decided the size of the finished card.
I found a sheet with a calligraphy design that I rather liked, but it looked very dull once folded, so I started to brighten it up........
                                                                                     I stamped a leaf four times into the centre, and four small butterflies directly onto the paper, then two large butterflies onto card, which I cut out once coloured with pens and glued over leaves.I think I have worked out how to add them dangling from acetate if i try this again.....
I cut a base card from black card, added red mats to the inside before gluing the folded paper in.
For the cover I stamped a script stamp and the same leaf stamp using distress ink (wild honey?) , added another cut out butterfly and the word stamp - red mat was hand cut, and not very accurately as it turned out!

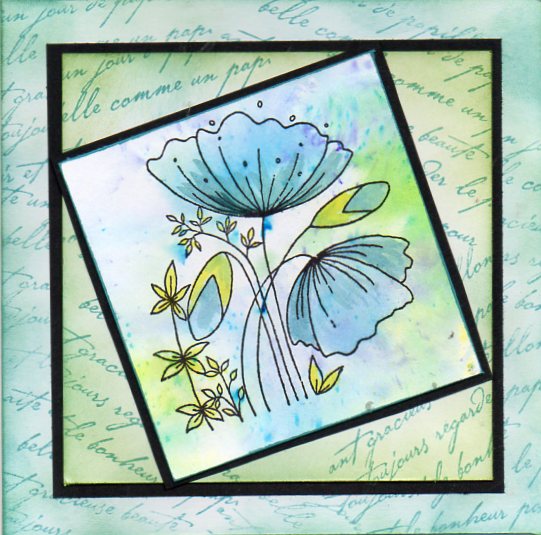

I was much happier with the last card we did, using brushos - the first time I hadn't taken my brushos with me, too! Base card and the main mat were stamped with a script stamp using broken china distress ink, then brushed with peeled paint and more broken china - the narrow mats are black.
The last one was finished off today, I made a brusho background onto water colour paper, trying to remember which blue I had used - I knew the green was leaf , and finally went for prussian blue instead of the cobalt I normally use. Mat in this case is dark green.

Sunday, 5 October 2014

angel and madonna - Diva 2

 As promised, the final part of the Div Red day yesterday - the weather co-operated inasmuch as the sun came out, but I did not appreciate scraping the ice off the car this morning! It also took 3 different cameras to try to get a decent image...........and a great deal of muttering.................
I tend to make simple cards, and Moira loves the complicated ones, so it is a nice change to have to make them occasionally - and I have to admit I do enjoy doing them. As Moira showed us her sample card, I had a brainwave and decided to use my new Chocolate Baroque stamps instead of the diecuts Moira was using - the angel just fitted nicely, although the madonna was more awkward.
The word and the stars are all from the same set of stamps - I stamped and gold embossed these first onto the scored card, then stamped the angel and madonna onto a spare piece of matching card and cut them out. I glued the angel partly overlapping the fold at the front - and I did check before I added the glue! The madonna I had to trim right down to fit the size of the central panel, and mounted it onto gold mirri card.
I decided to make another one, this time using the full sheet of A4 card, so the card was taller - the other dimensions were the same - partial scores at 5 and 25cm, and full scores down at 10 and 20 cms along the long side of the sheet- the original bar at top and bottom was 3cms,  and I did increase this a little for the second card. You can see the difference in the height of the card by the space above the angel, who this time was embossed in silver. I also did a second angel for the back panel. I left the stars off as I thought they would be a bit too much with the two angels.
The madonna stamp still had to be cut down, but not by as much.

Here they are both together, so you can see the difference in height.

Saturday, 4 October 2014

Diva Red part 1

Spent a wet day at Gissing with Moira , Janet and 5 other ladies, all happily getting inky.
This is the second of Moira's cards , and is a double-fold card - the front part was a ready-made card blank, with the back piece trimmed down and glued to another plain square card blank .
My camera is playing up , so these are scans.
I stamped the snowflakes from the Chocolate Baroque set a child is born, using Moira's multicoloured ink pad, then brushed cloud blue and juniper adirondack inks over the front.
The inner piece was a piece of water colour card coloured with  brushos (what else?)
I masked part of the card off first to give a snowy area, then used crumpled cling film and liquid pearls to dab in mountains,  sprinkled grey and turquoise brusho powders over the rest of the card, then spritzed heavily with water.
 Covered the wet card with more cling film, scrunched it up and left it to dry. Once it was dry, i used torn paper to sponge in the snow using the cloud blue and juniper inks again, then sprayed the sky with home-made glimmer spray using shimmer ink, water and isopropyl alcohol. Die cut deer added to the snowy fields, then the piece was matted onto silver card and glued to cover up the joined cards. We added acetate behind the cut out on the front, then added the diecut stag.
I will add the other card tomorrow once I get a decent photo, as no way will it scan - hopefully the weather will co-operate............
Janet's cards were much simpler -the one on the leftt was very quick, but very effective, using a Clarity stencil.
The stencil was taped down onto white card, then the blue and juniper inks were brushed through the stencil, and the darker bits sponged in. Once the ink was dry - I cheated and used the heat gun- we glittered the centre image - I used a white glitter that turned out to be mainly clear, so I went over part of the dove with a glue pen and added another glitter that claimed to be sapphire but looked more like an iridescent silver..........Matted onto grey card brushed with the blue and green inks, then onto silver before mounting onto a white card blank.
For the other card we used alcohol inks to create the background strip and the card used for the diecut poinsettia - I used latte, pest and rust, which came out rather paler than I was expecting. The strip of card across the front used 2 holly spray stamps, coloured with a mixture of inks and marker pens, trimmed down, matted onto a strip of gold card then onto the inked background strip before mounting on a white DL card. The poinsettia was held together with a brad, leaves curled slightly, then glued over the join of the two stamped images with glue gel.

Monday, 21 July 2014

Diva Red cards

 These are the cards I did yesterday with Moira and Janet at Gissing - far too hot to do anything but craft in a very leisurely way!
The first card was Moira's, inspired by Laura Williams (am sure Moira will correct me if I got the surname wrong) which has an acetate overlay - on mine it is far flatter than the original, which is how I managed to scan it.
The base card is 8" square, and the main panel is 7". The Sheena flower stamps were stamped with stazon and masked, then the background was done using distress inks on a mat, sprayed with water and mopped up - I used old paper, weathered wood and black soot, bit of an odd combo but I didn't have my box of ink pads with me, and that was what was available, and I really liked the result.

Once it was all dry, we used mildew cleaner (yes, I know, that was what we thought - would have been bleach but Moira had run out of it, and it does work!) to bleach out the flowers from the background. I coloured the leaves in with watercolour pencils after bleaching them.
More flowers were stamped onto the acetate with stazon again, then painted on the reverse with acrylic paints - despite the heat it took a time for the acrylics to dry, so we all ended up finishing off later at home.
The other card was based on one
  Janet
did a while ago using shaving foam  marbled card left over from a Clarity workshop, but we used alcohol inks on some new Chromo(?) card from Clarity, which is very shiny - butterflies are spellbinders dies, not sure about the seed head ones.

Wednesday, 11 September 2013

Diva Red

 I don't normally get to any of the Diva Red workshops, but did manage the morning last Saturday, and these cards are the result.
I had to scan them both, as the weather is too lousy for the camera - and the birdcage is meant to be hanging straight down, not squiffy, but I ran out of patience fiddling with the scanner!
The birdcage was Moira's card, and took quite a time to do - and I don't think she has recovered yet from seeing that I did what I was told to do! (mind you, the fact that this session was held in the village hall and all Moira's stash was not available probably had a lot to do with that). it started out as a triple fold card, and the first double fold was cut using a spellbinder die and a grand caliber - this suffered from cutting through 2 layers of heavyweight card, so much so that it got really hot, and will probably have to end up in diecut hospital - which definitely took musclepower.
The front of the card and the insert were both stamped with a Clarity leafy swirl stamp, with a greeny embossing powder used on the front and perfect pearls on the insert. Birdcage was a Marianne die, butterflies spellbinders embossed with an embossabilities stencil, not sure where the swirl die came from. Hopefully Moira will blog the correct details sometime
Janet's contribution was the Christmas card using a Clarity stamps - the colour combination was right up my street, and it would be a very easy card to batch make; details are on Janet's blog, so you are spared my version of how to!